 Protocol
Author
Hongyan Xie
Overview
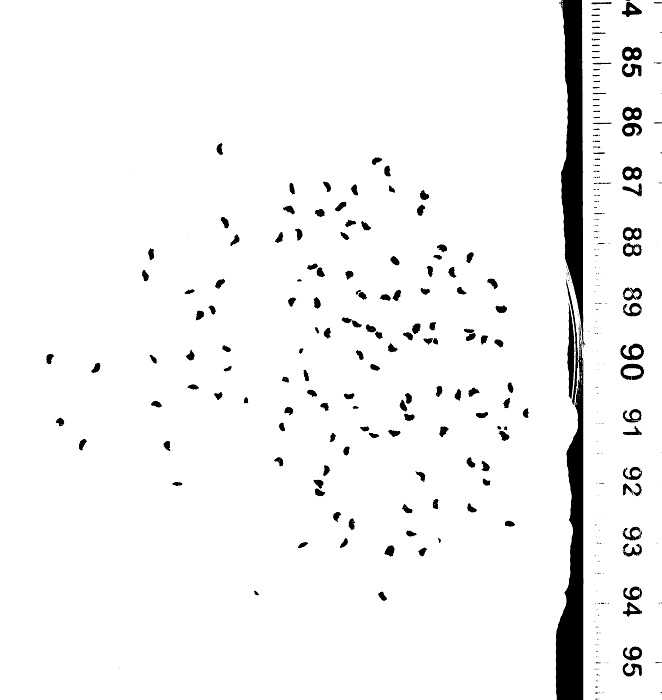
Counting seeds rapidly and easily using scanned images and ImageJ and Photoshop software.
NOTE: A similar protocol can be used to measure leaf traits (see Measuring leaf perimeter and leaf area ).
Background
ImageJ and Photoshop are useful tools for analysing digital images rapidly and accurately. This protocol dramatically reduces the amount of time which could be spent manually counting or measuring individual seeds.
Materials/Equipment
- Scanner attached to computer or digital camera and computer
- Image J software (shareware: http://rsbweb.nih.gov/ij/download.html )
- Seeds (pat dry before placing on scanner)
- Ruler or scale bar
- Petri dish (clear)
Procedure
- Place a petri-dish on the face of the scanner and put a ruler face-down next to it. Scatter seeds in the petri-dish, so seeds are not touching each other.
- Select the scan area to include petri-dish and ruler together, and press Scan.
- Select Natural Color and save the file in JPG format.

- Open the file in Photoshop, Photoshop Elements or similar program. Edit the image if needed, using tools such as Erase (in toolbar) to remove any unwanted fragments or debris and the edge of the petri-dish. Only seeds and the ruler should remain as distinct objects on the glass.
- Within Image (Menu bar), select Mode and choose Bitmap to convert the color image to black and white format, select Resolution e.g. 600 pixel/cm, and threshold e.g. 50%. Edit the image if needed to remove any remaining unwanted black patches. Keep the ruler scale and numbers clearly visible.
- Save this edited file in TIF format.
- Open this TIF file in ImageJ.
- In toolbar, use Straight line selections to measure a certain length (cm) of the ruler, and make a note of this length.
- Within Menu bar, go to Analyze and select Set Scale, put the measured length (cm) into Known Distance, set Unit of Length to cm, and make a note of the Scale (pixels/cm).
- Use Rectangular Selections to define an area enclosing only the seeds.
- Within Menu bar, go to Analyze and select Set Measurement, tick the contents you need, e.g. Area, Standard Deviation, Min and Max Gray Value, Center of Mass, Mean Gray Value, Median and Display Label.
- Within Menu bar, go to Analyze and select Analyze Particles, Size put 0 – 99999, select Display Results and Summarize, and then press OK.
- Copy the Results and Summary and Paste them to a new Excel file and Save it. Give each individual Excel file a distinct name.
- Within Menu bar, go to Analyze and select Distribution, set Parameter as Area, Specify the number of Bins needed, e.g. 10, or select Automatic Binning. You may need to discard smaller bins as immature or aborted seeds. Copy the results and paste to the Excel file.


Enjoy your counting