 Protocol
Author
Nele Schmitz
OVERVIEW
Although this manual is based on experience from cutting hard tropical wood samples, it can be used as a starting point to make thin sections from any plant species. When alternatives were available, the least hazardous chemicals were chosen.
BACKGROUND
A few remarks in advance
- Fixative used was FAA: 50 ml ethanol (95 %), 5 ml glacial acetic acid, 10 ml formaldehyde (37-40 %) and 35 ml distilled water. Alternative chemicals, of equal quality, but lower toxicity – for use when intra-cellular studies are not envisaged are:
- 50-70 % ethanol
- Copenhagen Mix: 99% ethanol: DI water: glycerol (70:28:2)Copenhagen Mix is recommended for hard wood samples since the glycerol will avoid the wood to become even harder because of the dehydrating effect of the alcohol.
- For quantitative wood anatomy it is advisable to store the fresh wood samples in Strasburger solution (one third ethanol (95%), one third glycerine (99%), one third distilled water) as (1) it obviate the risk of cracking of the sample surface during drying and (2) it makes the boiling of the samples in water obsolete, as the samples are already soaked with liquids.
- Depending on the hardness of the wood, cut little blocks of ca. 5 to 10 mm² and of at least 1 but max. 2 cm long (otherwise it will not fit in the microtome). Be sure that the sample is cut in such a way that you can easily make slides afterwards (i.e. perpendicular to the longitudinal plane for transverse slides).
- Use small paper tags marked in pencil to label tissue samples. Place the tag in a vial with the tissue specimen so that the tag follows the sample through the subsequent steps.
UNITS, TERMS, DEFINITIONS
DI water = distilled water EtOH – Ethanol PEG Tv Tg Rd
PROCEDURE
This protocol procedure is divided into the following major components:
- Tissue dehydration
- PEG infiltration and embedding
- Softening wood samples (for air-dried samples)
- Sectioning
- For PEG embedded samples
- For air-dried or liquid preserved samples
- Staining and dehydratation
- Making slides
TISSUE DEHYDRATION
Comment: Tissue dehydration is not really necessary if instead you let samples infiltrate for a longer time with PEG (see PEG infiltration and embedding below). If FAA was used as a fixative however, the washing step SHOULD NOT be skipped. It is essential to remove the toxic formaldehyde and acetic acid. The washing steps should therefore be carried out in the fumehood.
- First wash tissues in the fixative solvent, 50 % ethanol, for ca. 10 min (in the meantime you can prepare the different ethanol concentrations).
- Dehydrate in graded ethanol series.
- For all but the final EtOH dilutions commercial 95 % may be used.
- Samples are put in the oven at 60∘C in little glass beakers, several together in a large beaker with a large watch glass on top to prevent evaporation.
Table 1
| %EtOH | Time | Notes |
| 50 | 1 h | |
| 70 | 1 h | Tissues can be stored for several days in 70% Ethanol or higher |
| 96 | 1 h | |
| 100 | 2-4 h | |
| 100 | weekend |
PEG INFILTRATION AND EMBEDDING
Note: PEG is corrosive to all metals, especially iron!! Primary remark if samples = microcores Before putting the cores in PEG you have to mark the side of the core you want to make slides of (Tv, Tg or Rd). If the cores are wet of the alcohol you can see the direction of the fibers and in this way you know where the Tv plane is. You can now put a dot with a permanent marker on that side and/or cut a piece with a scalpel such that the transverse plane (or Rd or Tg) is already straight (not round anymore). Procedure
- To melt pure PEG 1500, put a beaker with PEG grains in a bath of warm water (Note:PEG should never boil!).
- Place the samples in a mould for ice-cubes, pour the hot PEG over it (4-5 mm above the sample. If the samples are floating don’t worry, after one hour they will sink) and place it in the oven at 60∘C for a period of at least one day and one night.
- Take the samples out of the oven and transfer the wood samples to a new mould, sprayed with some Para Gard (paraffin repellent – As an alternative you can use glycerine or some detergent). It will prevent sticking of the PEG blocks and allow for easy release of the PEG cubes.
- Pour new hot PEG over it (a depth of 3-5 mm above the top of the sample is usually sufficient) and let the PEG cool down at room temperature for one day and one night.
- Place small, pencilled labels in the PEG, facing out, so that the specimen blocks can be identified later.
- Place the sample in the mould so that the side you want to make slides of is upside down, facing the bottom of the mould.
- For small samples: first put some drops of liquid PEG in the cube, put the samples in the desired position and let harden. Now you can fill the cube with PEG without the little sample moving while pouring the PEG.
- After cooling of the PEG, the cube which has become hard can be pushed out of the mould by moving and turning with the mould.
SOFTENING WOOD SAMPLES (FOR AIR-DRIED SAMPLES)
- Start with soaking samples in DI water for one night in the oven at 60∘C or until the samples sink to the bottom of the glass vials.
- Use paper tags marked with pencil. Pencil marks directly written on the wood can disappear after soaking!
- If still too hard to section, put samples in oven again in solution of 1:3:1 (95% alcohol:glycerine:DI water) until you can make good sections.
SECTIONING
Many people prefer to cut sections with disposable blades (for paper knifes) fitted to a knife holder. With these tools you can cut high-quality thin sections but without the need to sharpen your knives which safes you a lot of time, material and money. However, if you prefer working with microtome knifes, you can follow this procedure to sharpen the knifes (Note: be careful not to cut yourself!):
- Make coarse and fine grinding solutions by adding 3 g of 1μ or 0.3μ Aluminium powder, respectively to 25 ml fine oil and shake until well mixed. It is not useful to make a bigger volume at once since the powder will clog at the bottom after a while. So use a plastic bottle with lid which can be thrown away after oil and powder can not be mixed anymore.
- Place the glass plate with the coarse side up in the sharpening machine. Pour some coarse grinding compound (not too much! Just draw a line of 2 cm width and 10 cm length) on the glass plate. Put both the push-button and the draw-button on ‘coarse’ and set the timer with a cork stop stuck for a period of 1 to several days depending of the state of the knife (check under the stereo microscope).
- After a day, check if there are still grooves under the microscope. If not, clean the glass plate, the knife and everything else with paper towels.
- Turn the glass plate to the fine side and pour, in the same way as before, fine sharpening compound on it and sharpen for 0.5-1 day. Check the edge with a microscope, the cutting edge should be uniformly smooth and show no grinding marks.
;:TIP: if there are still some cracks you can mark these spots with marker pen on the knife so that when cutting you know which positions of the knife to avoid For PEG embedded samples
- Trim the PEG block so that the sides which will be clamped in the microtome are straight. Carefully remove some PEG around all four sides of the wood sample (Note: only for big samples! If you remove PEG with small samples they may be pulled out of the PEG cube whilst sectioning). If not, the PEG can distort sensitive tissues (eg. cambium) because of the pressure when the PEG is cut with the microtome.
- While sectioning use a pencil to put some of the glycerine on the wood and on the knife. It will soften the wood and make the section slide more easily on the knife (Don’t use water or ethanol as it will dissolve the PEG!).
- When the wood samples are decayed or bark tends to loosen from the wood, a piece of transparent adhesive tape (Tesa crystal is the best: it does not dissolve in Parasolve) can be applied to the surface of the cube before cutting. In this case don’t use glycerine; the PEG block should be dry. Lift one side of the tape a little bit while pulling the knife so that the knife goes underneath the tape. Cut the section and transfer it to the cell strainer by using tweezers. Sometimes the tape detaches from the section, sometimes not. If it does, remove the tape from the strainer so that it will not interfere with the staining procedures.
For air-dried or liquid preserved samples
- Use a 1:3:1 (95% alcohol:glycerine:DI water) solution to wet the sample with your brush all the time while cutting to prevent drying and thus hardening. Also wet the knife each time before making a section to help the section sliding over the knife.
- Start cutting in the same direction as the rays or as other features of different density (for example conspicuous parenchyma or vessel bands or phloem bands). If the xylem will be analyzed, the sample should be fixed to the sample holder with the bark on the outside, so that the bark will be the first tissue cut by the knife. If phloem will be analyzed the xylem should be facing the knife, to avoid a smashing and crushing of the soft phloem tissue.
- For cross-sections: thin section should have a thickness of 15 to 20 μm for conifers. For deciduous tree with a lot of fiber tissue choose thickness of 10 μm for cross sections.
- For transverse samples start with a thickness of 25 μm and for longitudinal sections 16 μm
- Approach the sample with the knife (C-profile or disposable blades) until one tiny piece of wood at the corner of the block is cut, wet your brush, sample and knife, put the brush on the sample and cut in one smooth pull while moving your hand with brush to the opposite side guiding the section
- Put the slide in distilled water in a sieve+WITH marked paper tag. Make 3-4 sections per sample as some may be spoiled while staining or preparing slides. Alternative: Store the section on the object slide in a drop of glycerin solution (50% DI water and 50% glycerin). You can leave the section on the sample holder also for the dyeing and dehydration of the samples.
- Problem solving when cutting creates lines on the sample and/or cutting makes noise:
- Change the knife angle to a lower one. If you get successive thin and thick sections you made the knife angle too shallow.
- Change the orientation of the sample in the sample-holder. Try once parallel with the rays and once perpendicular with the rays. Depending on the presence of axial parenchyma, changes in density,… the best orientation to cut varies.
- Make smaller blocks (if you haven’t yet). Cut blocks with a surgical blade to 5 mm² blocks.
- Use a freshly sharpened knife.
- If you tried all of the above and still do not get good sections, the wood is still too hard and should be softened more.
- Problem solving when the cell wall gets torn off from the middle lamella
- Change the cutting angle to a sharper one.
- Harden the sample surface by using alcohol (96%) instead of 1:3:1 solution for the wetting the sample surface
;:+Cell strainers and 6-well plates used in cellular biology labs have been proven very useful is you have to make many sections.
STAINING AND DEHYDRATATION
Reminder:
- If 1st dye is aqueous put slide in water before staining
- Safranin-FG is especially good for meristematic tissues.
- If after safranin staining the slide is put too long in alcohol the safranin will be removed ℼ rapid alcohol series
- Excess FG can be removed by putting it in differentiation solution (see below)
Method 1 Table 2
| %EtOH | Other chemicals | Time |
| 50 | / | 5 min. |
| / | 1 g/l aqueous Safranin solution | 10 min. |
| 50 | / | 2 x 5 min. |
| 75 | / | 5 min. |
| / | Fast Green, 0.1 g in 100 ml 96% ethanol | 4 min. |
| 96 | / | 5 min. |
| 100 | / | 15 min. |
| / | Parasolve | 2-3 h |
Note: Don’t use Parasolve if the sections are attached to adhesive tape since Parasolve dissolves some brands (for example Sellotape, Tesafilm Cristalclear are Ok). The above times are just an indication. For each species and even samples different times should be tried out to find the optimal staining conditions. Method 2
| Minutes | Treatment | Notes |
| DI water | from sectioning onwards | |
| 10 | Safranin (1 g/l water) | |
| 2×5 | 50% alcohol | |
| 5 | 75% alcohol | |
| 5 | 96% alcohol | |
| 2×5 | 100% alcohol | |
| 1-2 | Fast Green solution* | in glass or porcelain cups |
| 2×10 | Differentiation solutionT | in glass or porcelain cups |
| 30 | Parasolve | in little glass bottles |
;: * 0.5 g fast green in 50ml clove oil + 50 ml 100% alcohol
T50ml clove oil + 25 ml 100% alcohol + 25 ml parasolve TIP: Sections with tape can be treated with parasolve depending on which brand of tape. The brand Sellotape is attacked by parasolve but Tesafilm is not. Method 3 If no double staining is needed then Method 2 can be used until the 100% alcohol step. Afterwards the section can be mounted immediately on a slide by using Euparal (see below). Method 4 Table 4
| Minutes | Treatment | Notes |
| 5 | DI water* | |
| 5 | Staining solution | mix of safranin & alcian blue** |
| 1 | DI water | just rinse |
| 1 | 50% alcohol | |
| 1 | 75% alcohol | |
| 1 | 96% alcohol | |
| 1 | 100% alcohol | |
| 1 | Xylol |
*Only for sections stored in alcohol or glycerine solution, not needed if section was kept in water from sectioning onwards **Dissolve 0.35g safranin in 35ml 50% alcohol, dissolve 0.65g alcian blue in 65 ml DI H20 and mix with the safranin solution. TIP: Use a separate six-well plate for the staining solution so that it can be recuperated and re-used afterwards. Use also for each alcohol step a different plate to avoid confusion. Note: Don’t leave sections much longer (certainly not 30 min.) in 100% alcohol because the safranin stain will disappear again. The easiest way is to prepare slides while waiting during the previous steps by marking them with pencil (marker pen can dissolve because of the ethanol!).
MAKING SLIDES
Reminder: Never let your slides dry to avoid air bubbles coming in. Especially when the last step was 100% ethanol, after putting the sections on a slide immediately cover them with Euparal. Permanent slides
- Take the section carefully with tweezers and put it on a slide WITH correct pencil mark
- If sections are curled, carefully flatten them with two pencil brushes and cut the curled sides (which do not uncurl) with a scalpel.
- Put some Canadabalsem (if Parasolve or Xylol was used as last step) or Euparal (if alcohol was used in the last step – Euparal is not soluble in Parasolve, but it is in alcohol) on the section. For Euparal use of a Pasteur pipette is easiest. Just a few drops are enough: flooding over the cover glass but also air under the cover glass should be limited.
- To mount the coverslip, gently place one edge of the coverslip on the slide and with a pointer or forceps slowly lower the coverslip. Leave the slides like this for some minutes so that the mounting medium can spread.
- Put the slides on two wooden beams (if just on a plate they can stick to it when Euparal is squeezed out when putting weights) in the oven and put 1-2 weights on top of the coverglasses. Leave the slides at 60∘C for one night to dry and to let potential air bubbles disappear. Place a post-it on the oven when slides are in so that other users know they have to be careful when opening the oven.
- After 1 night carefully remove the weights. If some weights are stuck turn carefully around, DON’T pull because you will suck air under the coverglass. With a cotton-bud add some 100% alcohol (recuperated one) or Parasolve to remove Euparal or Canadabalsem. BUT only do this if the spilled mounting medium interferes with the section. If excess mounting medium only covers parts of the cover slip not overlying the section, you better don’t remove it. Cleaning will also create greasy stripes on the cover glass.
- Alternative: Put the sticky object slide on top of a metal plate, which should be covered with a plastic foil. Cover the object slide with another plastic foil and put a magnet on top of the object slide. You should place the magnet directly over the thin section to push the air out of the sample. Put everything in the oven (60∘C). After one night take the metal plate with the slides and the magnets out of the oven and let it cool down for at least 1 hour before you take off the magnets.
Non-permanent slides Put the section on the slide and dry the slide around the section with some pieces of filterpaper. Do not dry the section itself to avoid air in the section. Put some drops of glycerine and cover with a coverslip.
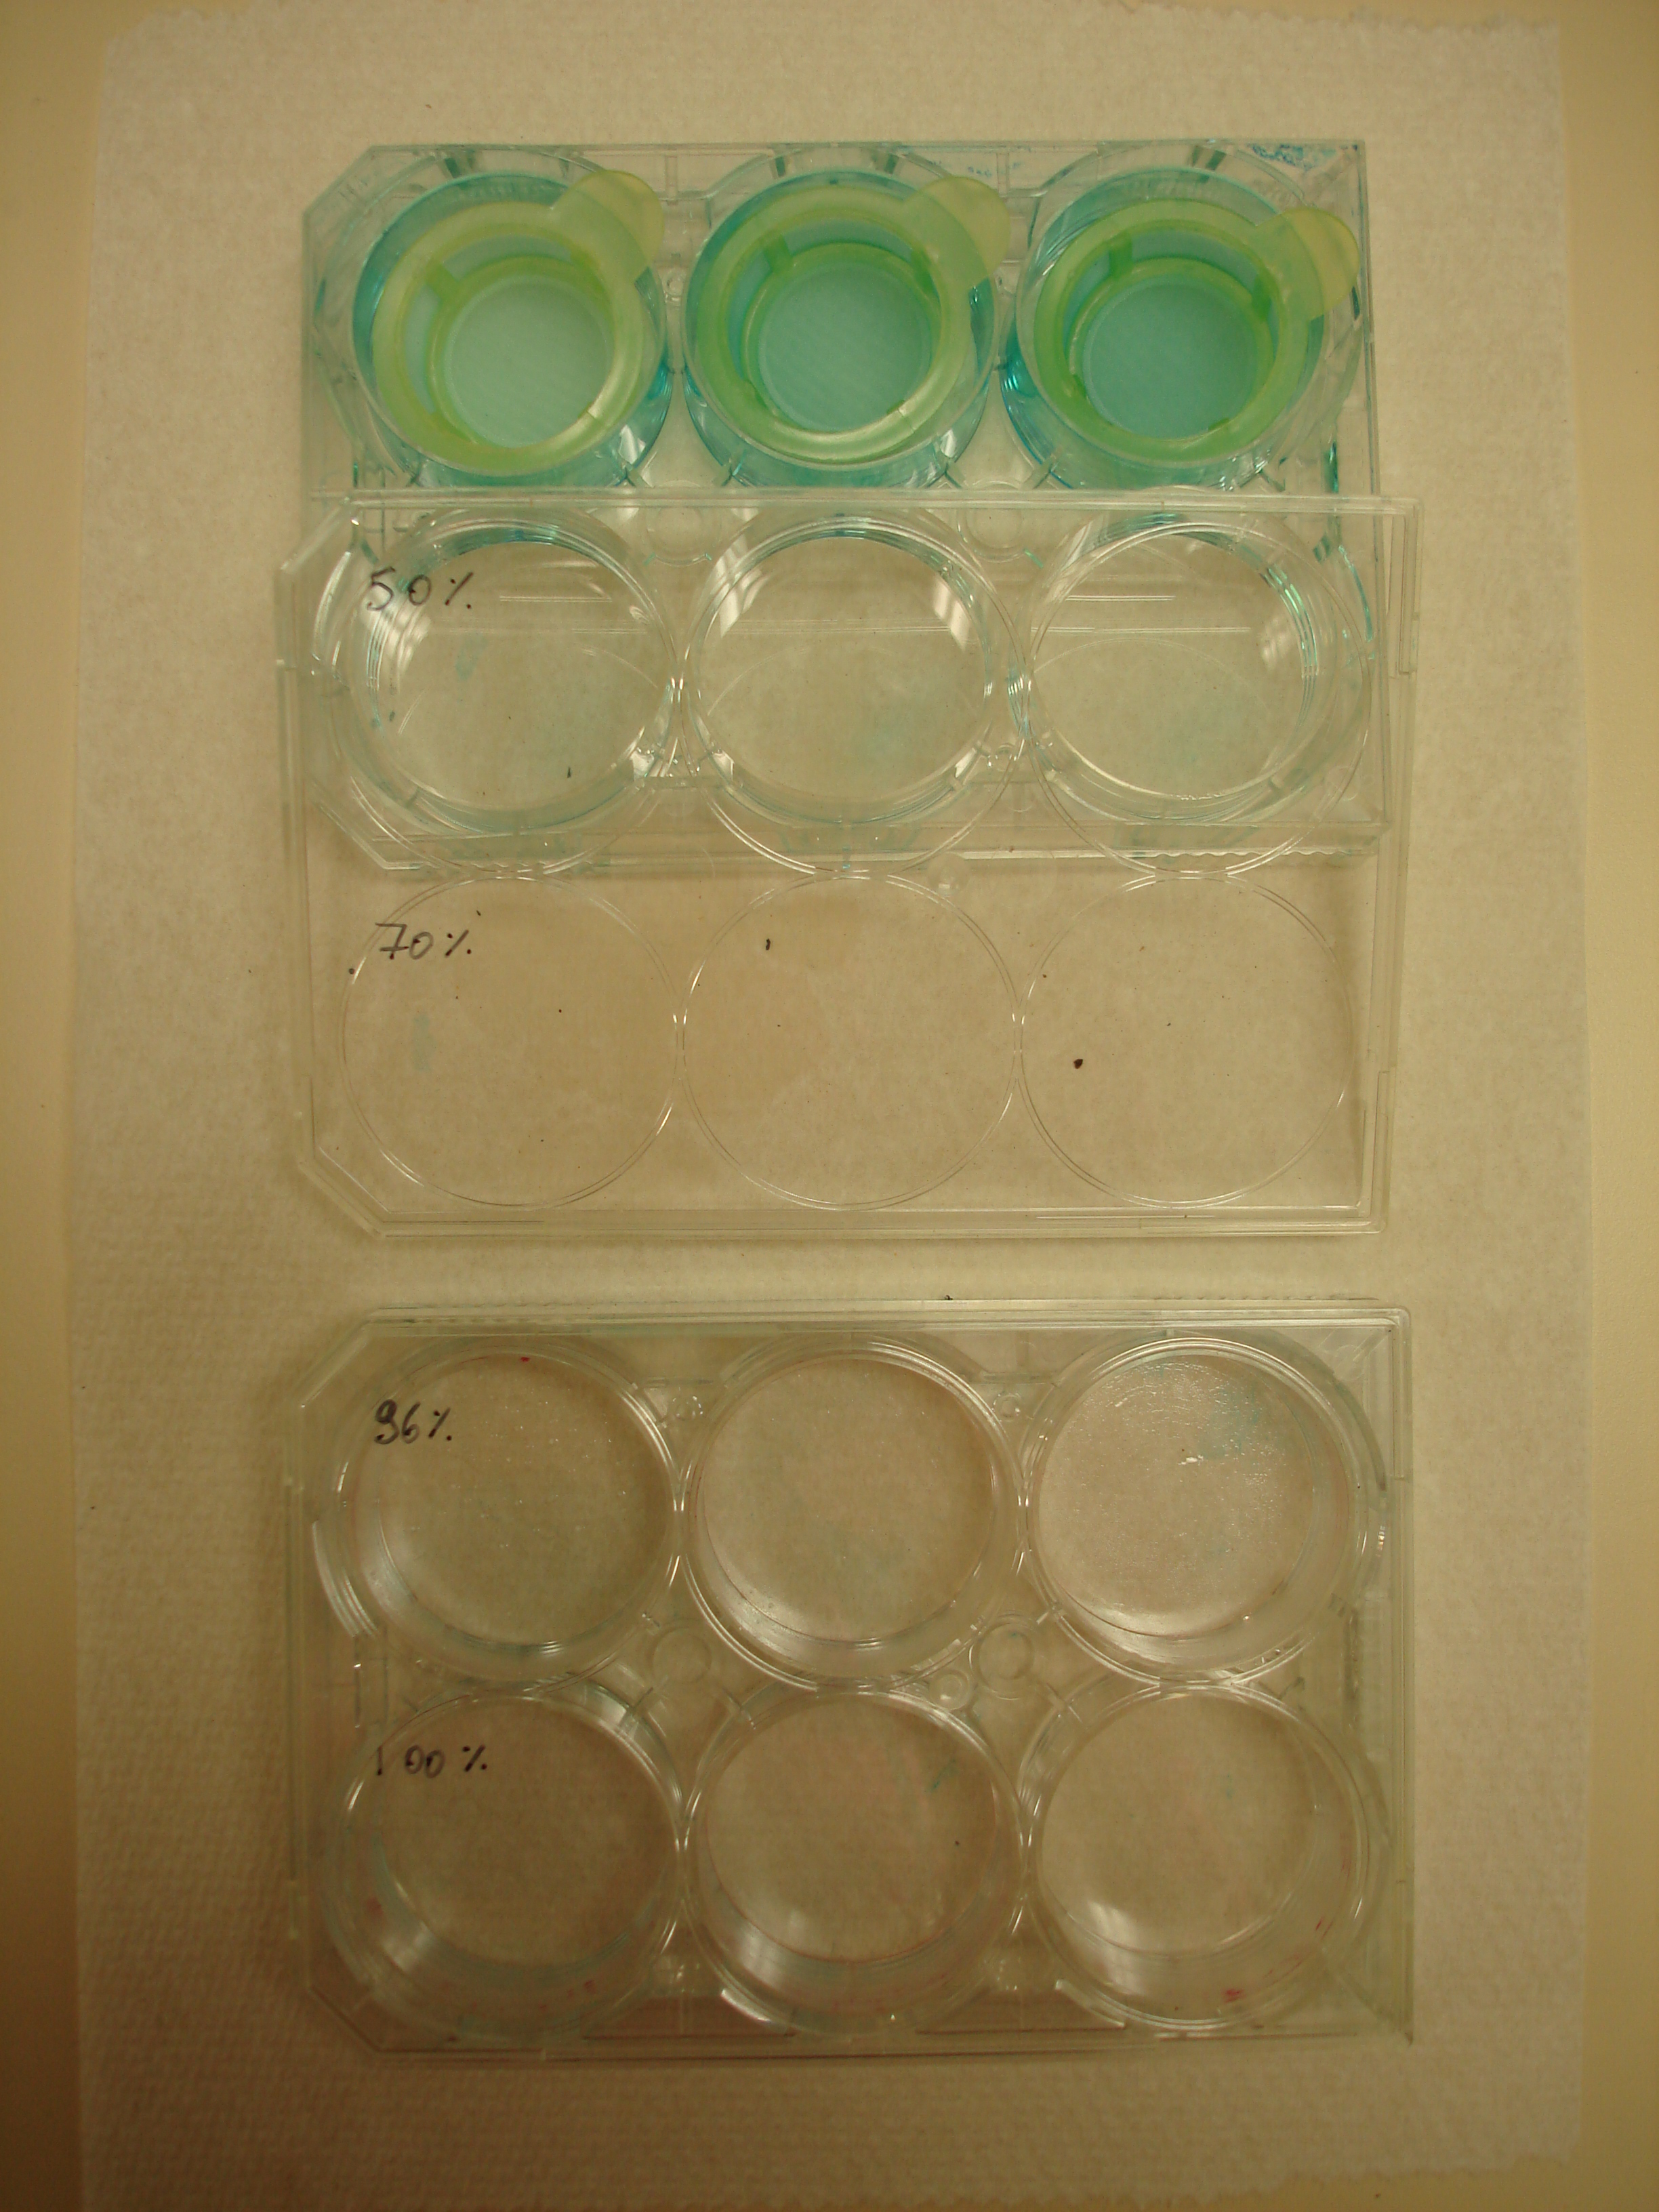
Fig.: Strainers and 6-well plates used for the gradual dehydration of microsections in an easy and quick way
LITERATURE REFERENCES
Books & Articles
De Micco V, Aronne G, 2007. Combined histochemistry and autofluorescence for identifying lignin distribution in cell walls. Biotechnic & Histochemistry 82(4-5), 209-216.
Rapp AO, Behrmann K. 1998. Preparation of wood for microscopic analysis after decay testing. Holz als Roh- und Werkstoff 56: 277-278.
Ruzin SE. 1999. Plant microtechnique and microscopy. New York, USA: Oxford University Press.
Websites
http://www.woodanatomy.ch/preparation.html http://www.microscopyforum.com/search.php mode=results http://www.microscopie.be/ http://insidewood.lib.ncsu.edu/search/.0;jsessionid=e1f94a2121a980e60ee97147b904
HEALTH, SAFETY & HAZARDOUS WASTE DISPOSAL CONSIDERATIONS
PEG:
- PEG is corrosive to all metals, especially iron!!
- PEG should never boil!
The author would like to thank Jožica Gri ar and Britta Eilmann for reviewing this protocol.